Step 1: Login to the Tacitine. (If you are configuring the Tacitine for the first time, the default Lan IP is https://192.168.100.1:4433)and Default username: admin & Password: admin99
Step 3: Click the Configuration > Hotspot tab.
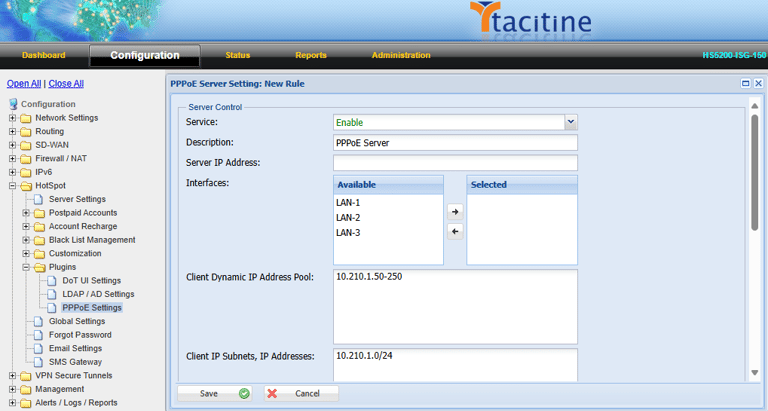
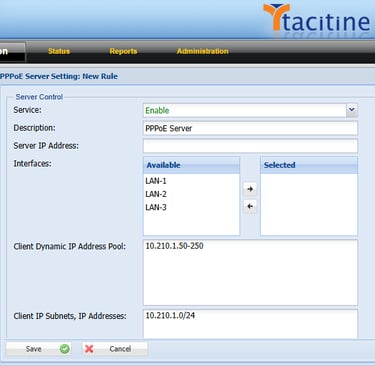
Step 4: Click the Plugins > PPPoE Settings > Enable
How to Configure the PPPoE User Creation
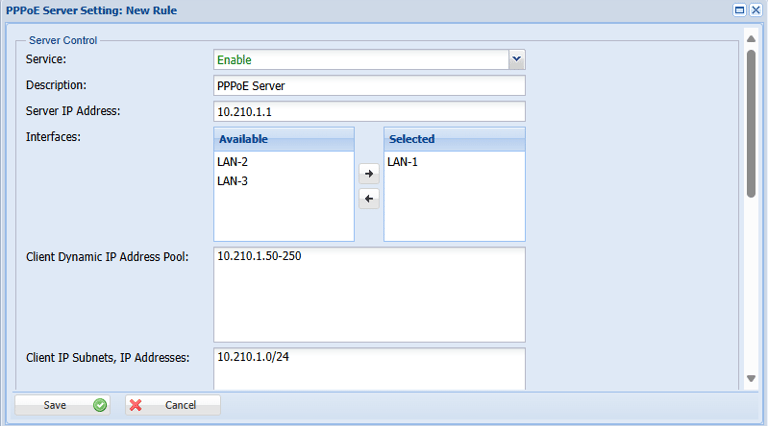
Step 5: Assign Server IP Address for the PPPoE server for e.g.: below figure, we assign 10.210.1.1
Step 6: Select the interface you want to publish the PPPOE server and drag it to the selected area. e.g.: we select LAN-1
Step 7: In the Hotspot User Management if the Login Control is PPPoE Dynamic you want to configure the Client dynamic Address Pool Eg: we assign the IP address 10.210.1.100- 250
Step 8: Set the Client IP subnet you want Publish in PPPoE Server
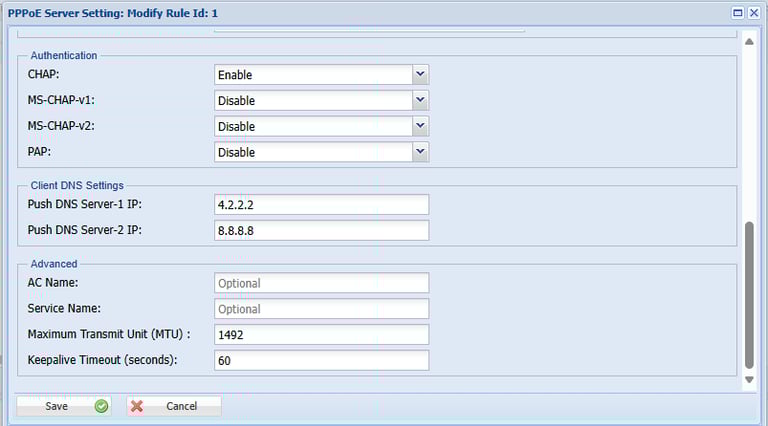
Step 9: Authentication methods are the default if your expert you set as enable.
Step 10: DNS setting is optional if you publish the DNS server in your Network assign the DNS Ip address
Step 11: DNS setting is optional if you publish the DNS server in your Network assign the DNS Ip address
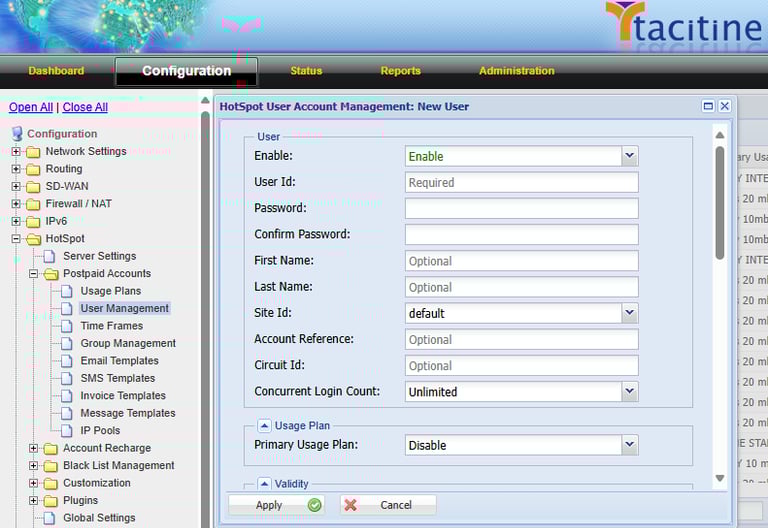
Step 12: Now Goto Configuration > Hotspot Tap
Step 13: Click the Postpaid Accounts > User Management > Add > Enable

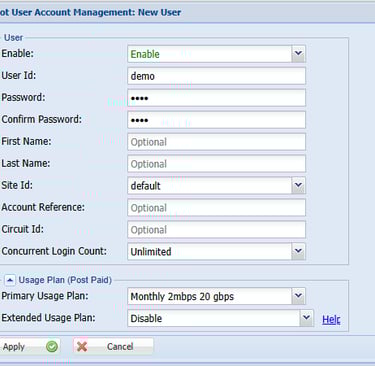
Step 14: Give the Username and Password for that user. Configure PPPoE method these credentials used for internet access.
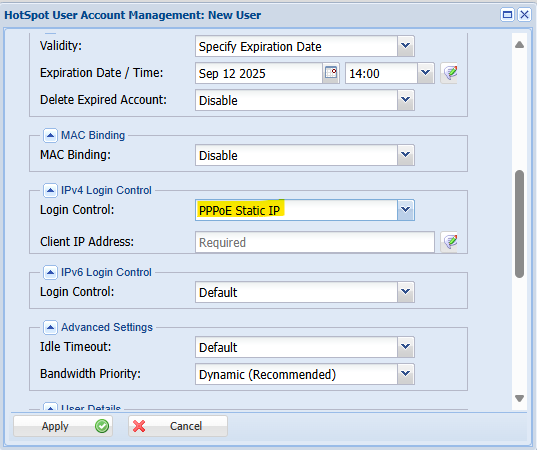
Step 15: Login Control you Should Select PPPOE Static IP /Dynamic Ip
Note: If you're Using PPPoE Static You Can Enter Free IP on PPPOE IP Series
Step 16: Finally Select Apply to save user account.
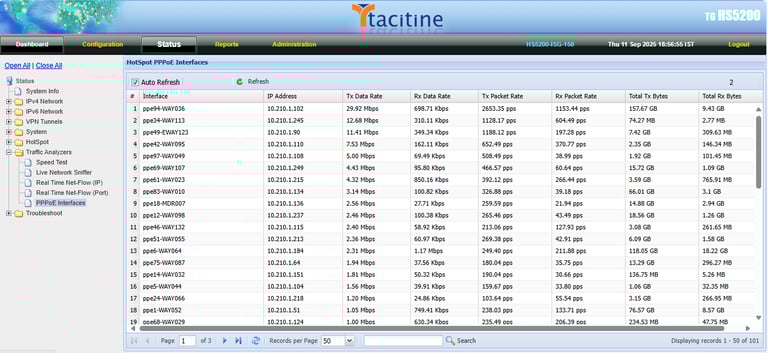
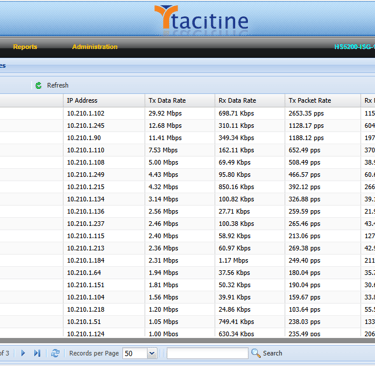
Step 17: Navigate Status > Traffic Analyzers > PPPoE
Step 18: In the PPPoE interface you can be able to view the PPPoE active user Live bandwidth Graph