Step 1: Login to the Tacitine. (If you are configuring the Tacitine for the first time, the default Lan IP is https://192.168.100.1:4433)and Default username: admin & Password: admin99
Step 2: Click the Configuration > Hotspot tab.
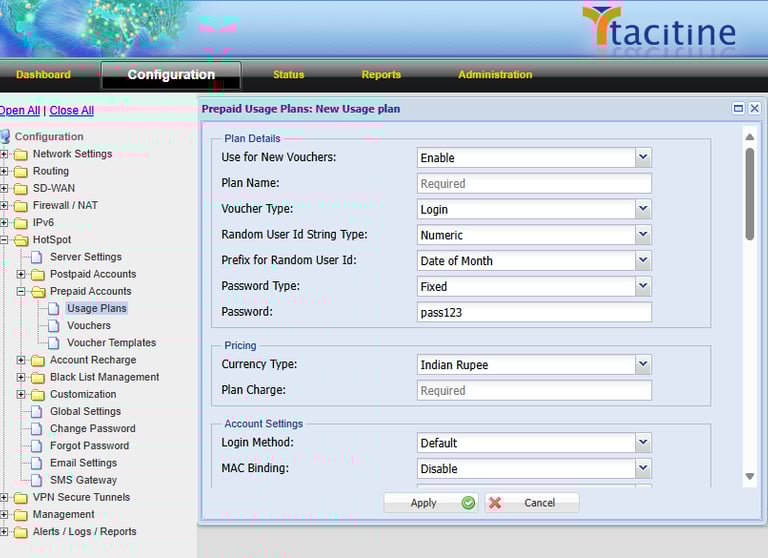
Step 3: Click the Prepaid Accounts > Usage Plans > Add
Note: For the First Time We Need to Create the Plans.

How to Configure the Hotspot Prepaid Accounts
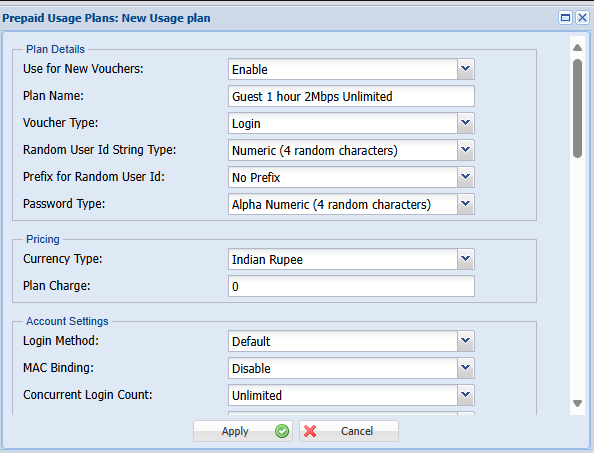
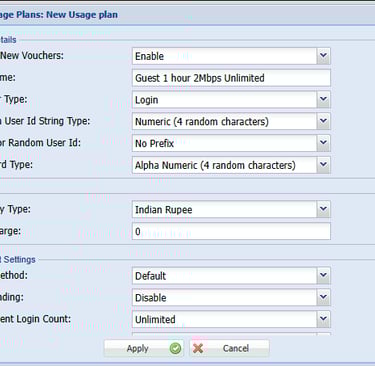
Step 4: Enable the Plan and Mention the Plan Name for Your Reference.
Step 5: Mention the Voucher Type Login / Recharge. Eg: Login
Step 6: Customize the User Id in the Random User Id. Eg: Numeric 4 Random Characters.
Step 7: If You Need a Prefix word For User Id Set Prefix for Random User Id otherwise Set No Prefix. Eg: No Prefix
Step 8: Customize the Password Type. Eg: Alpha-Numeric 4 Random Characters.
Step 9: Mention the Pricing Details. Eg: Plan Charge: 0
Step 10: Mention the Login Method Automatic After First Login. (Must be Enable the Mac Binding)
Step 11: Mention the Concurrent Login Limit for Per User. Eg: Unlimited
Step 12: Mention The Mobile Registration. Eg: Disable
Step 13: Mention the Account Validity Type. (Number Of Minutes/Number Of Days/Expiry Date) Eg: Number of Minutes from First Login
Step 14: Set the Account Validity Minutes. Eg: 1 Day (After 1 Day User can be disconnected automatically)
Step 15: Mention the Voucher Validity Days Eg:10 Days
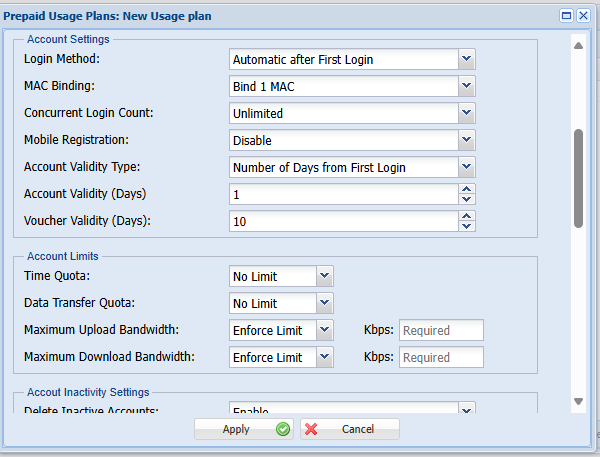
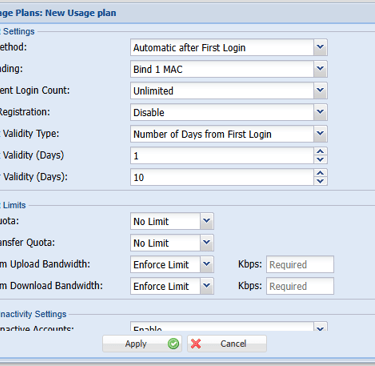
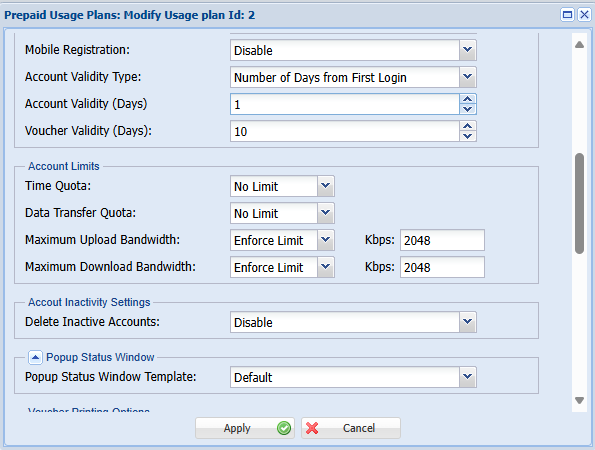

Step 16: Mention the Time Quota Eg: No Limit
Step 17: Mention the Data Transfer Quota. Eg: No Limit (It will Give Unlimited Data to the user)
Step 18: Mention the Upload / Download Bandwidth Speed. Eg: 2048kbps
Step 19: Mention the Delete Inactive Accounts. Eg: Disable
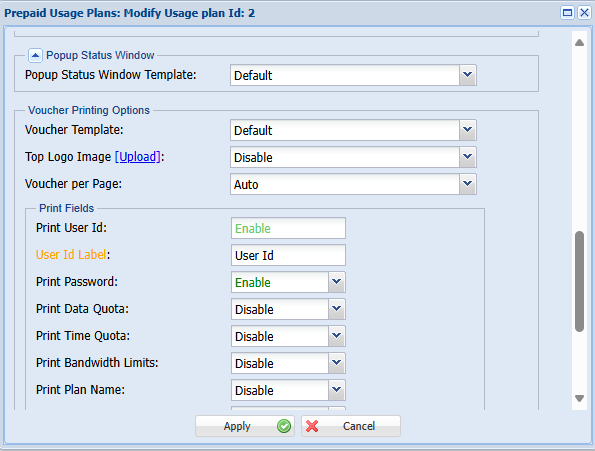

Step 20: Mention the Pop-up status Window. Eg: Default
Step 21: Select the Voucher Templates. Eg: Default. (Customize the Voucher Templates)
Step 22: Enable the Print Fileds Need to be Print on the voucher. Eg: User Id, Password.
Step 23: Finally Save the configuration.
Step 24: Now the Plan was Created Successfully. Eg: Guest 1 Hour 2Mbps Unlimited Data

Step 24: Now Go to Click the Configuration > Hotspot tab.
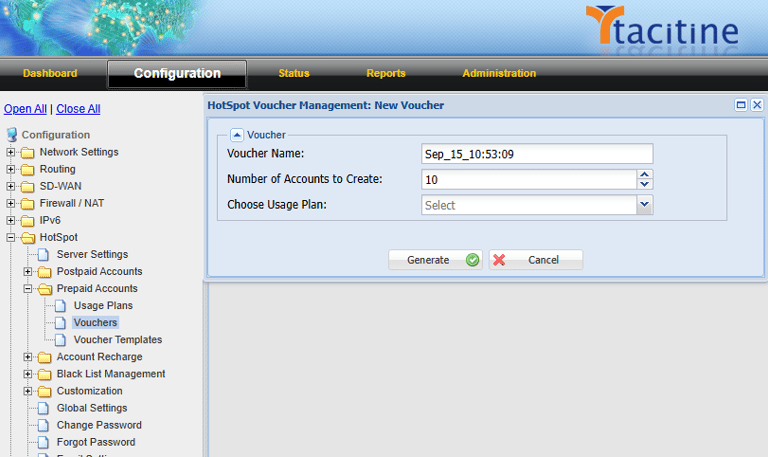
Step 25: Click the Prepaid Accounts > Vouchers > Add.
Step 26: Mention the Number of Accounts to create. Eg: 10 (It will Generate 10 Vouchers )

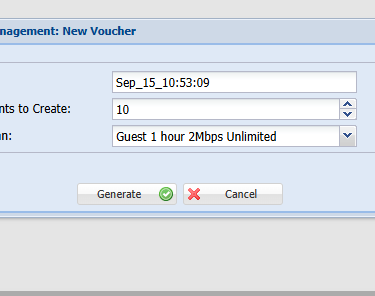
Step 27: Select the Usage plan has Created early. Eg: Guest 1 Hour 2Mbps Unlimited
Step 28: Finally, Click the Generate button.


Step 29: Now the Coupon was Generated Successfully.
Step 30: Select the coupons and Click the Print vouchers.
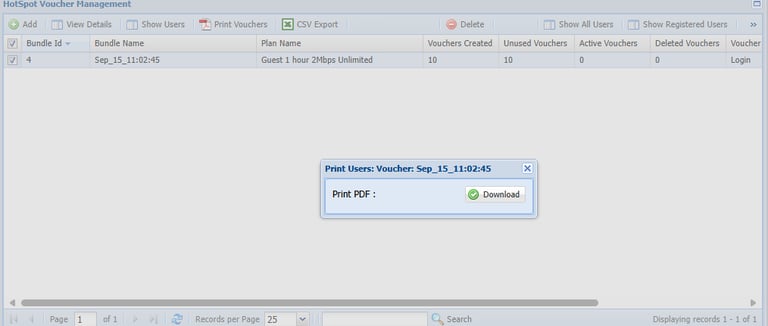
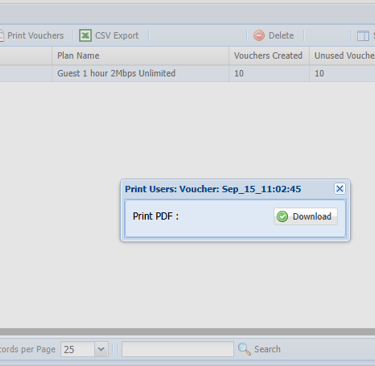
Step 30: Now the Voucher Click Download
Step 31: Open the Downloaded File for Generated vouchers. (10 vouchers are created)