Step 1: Login to the Tacitine. (If you are configuring the Tacitine for the first time, the default Lan IP is https://192.168.100.1:4433)and Default username: admin & Password: admin99
Step 2: Click the Configuration > Hotspot tab.
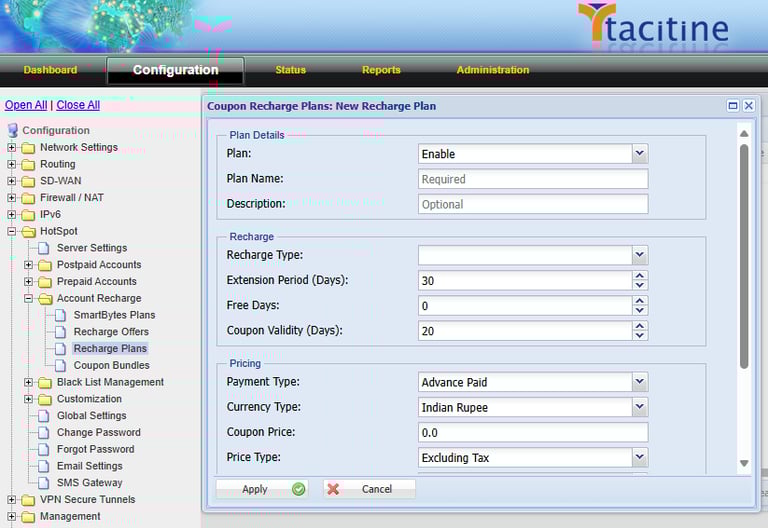
Step 3: Click the Account Recharge > Recharge Plans > Add.
Note: For the First Time We Need to Create the Plans.
How to Configure the Account Recharge
Step 4: Link Failure Detection Select Remote IP and Put Common Dns Ip E.g.: 8.8.8.8,4.2.2.2,..ect
Step 5: Click Save > Restart Service
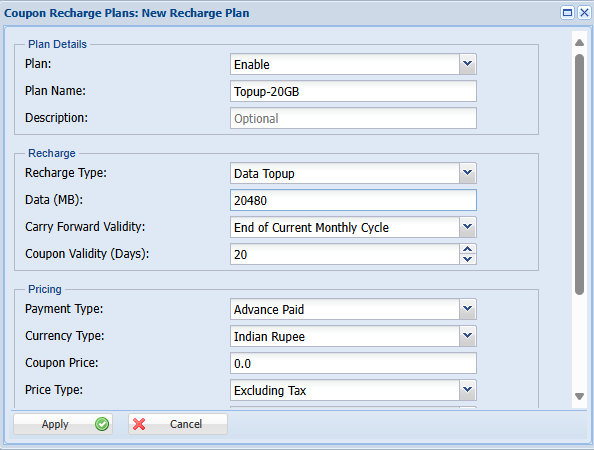
Step 4: Enable the Plan and Give the Plan Name for Your Reference Eg: Top-up 20GB
Step 5: Mention the Recharge Type as Data Top-up
Step 6: Mention the Data Limit You want to Recharge. Eg: 20Gb
Step 7: Mention the Carry Forward Validity for that Data. Eg: End of Current Month Cycle
Step 8: Mention the Coupon Pricing Details for Invoice. Then Click Apply to Save the Plan.
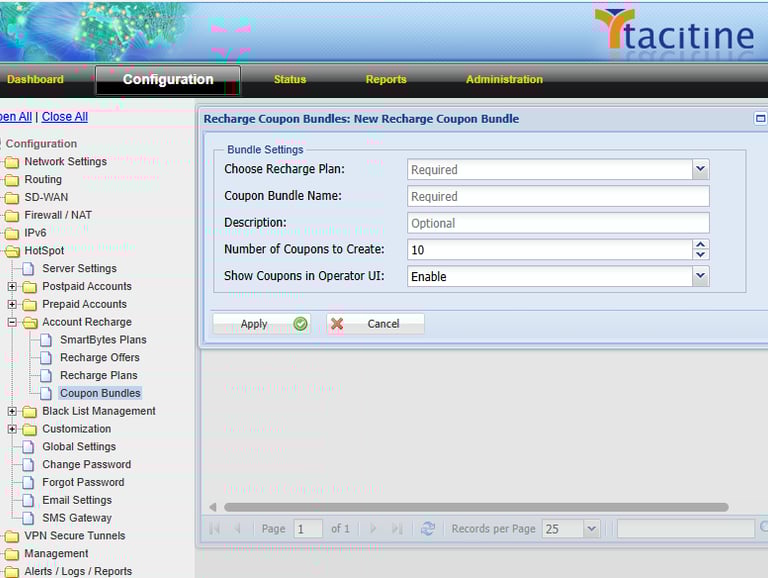

Step 9: Now Goto Hotspot > Account Recharge > Coupon Bundles > Add.
Step 10: Select the Recharge Plan Already You created in the Recharge Plans
Eg: Topup-20GB
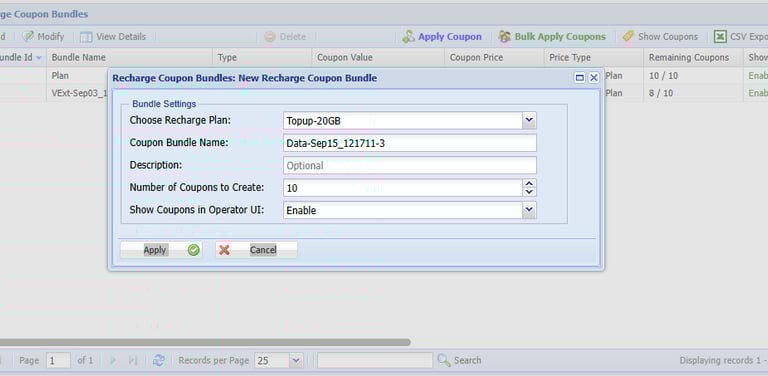
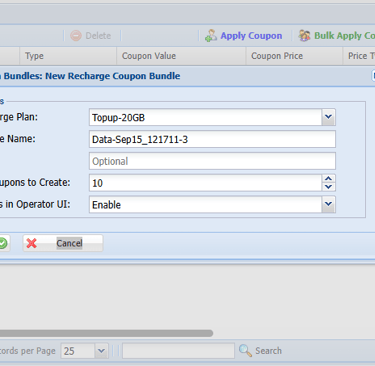
Step 11: Mention the Number of Coupons You Want to Create. Eg: 10
Step 12: Click Apply now the coupons was created successfully
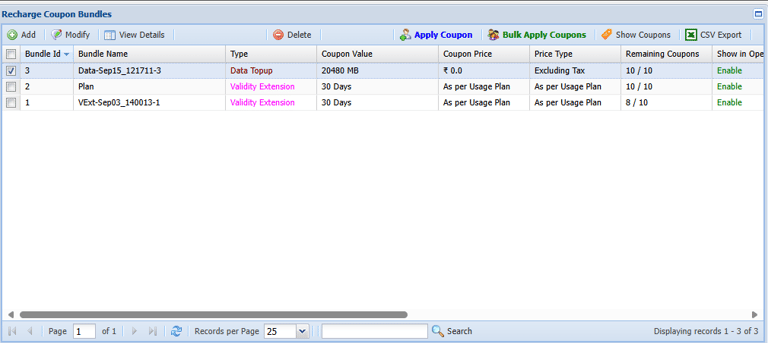
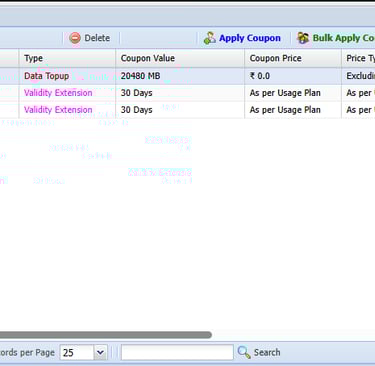
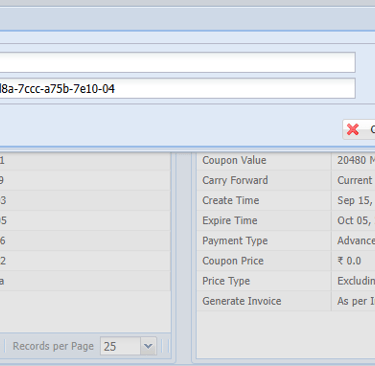
Step 13: Select the Coupons from the Coupon Bundles and Click Apply Coupon Button.
Step 14: Click Apply now the coupons was created successfully
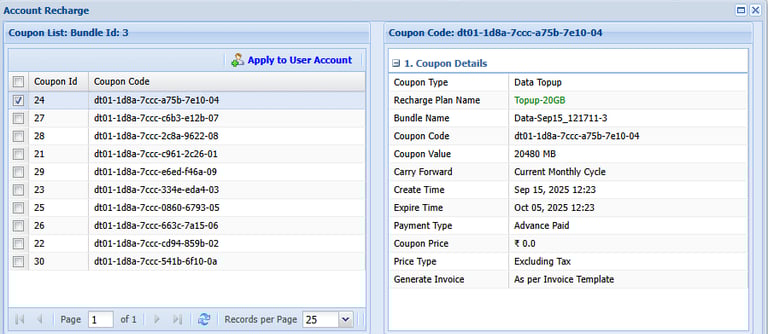
Step 15: Select the Coupon Code from the Coupon Bundles.
Step 16: Click Apply to User Account
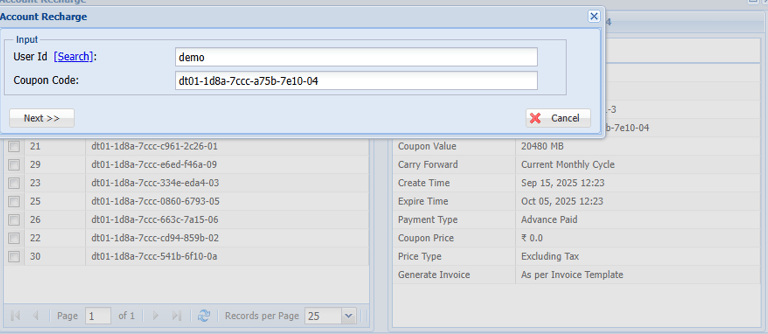
Step 17: Select the Search the Use Id and Select User.
Step 18: Click Next and Apply.
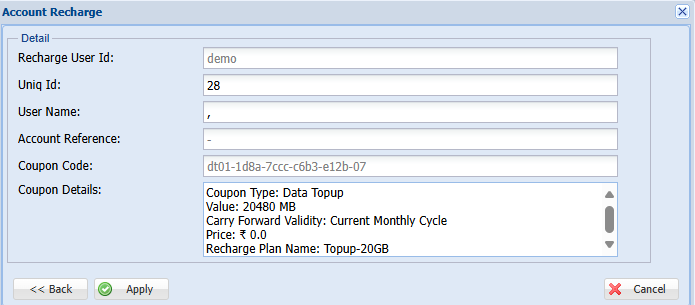
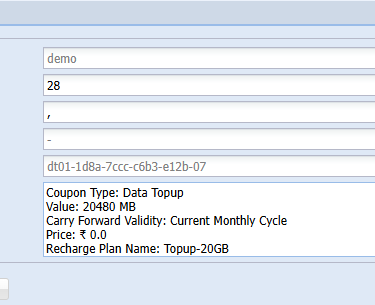
Step 19: Now the Below Figure Was Shown Then Click Apply to Recharge the Coupon to the Selected User